The Making of a Model Part 2
Okay, I left off yesterday with the shoulders, and lets just
jump right into it.
First off, we are going to make a quick circular sketch on
the right side flat part. Like so:


We extrude it out, and lets see how it looks:
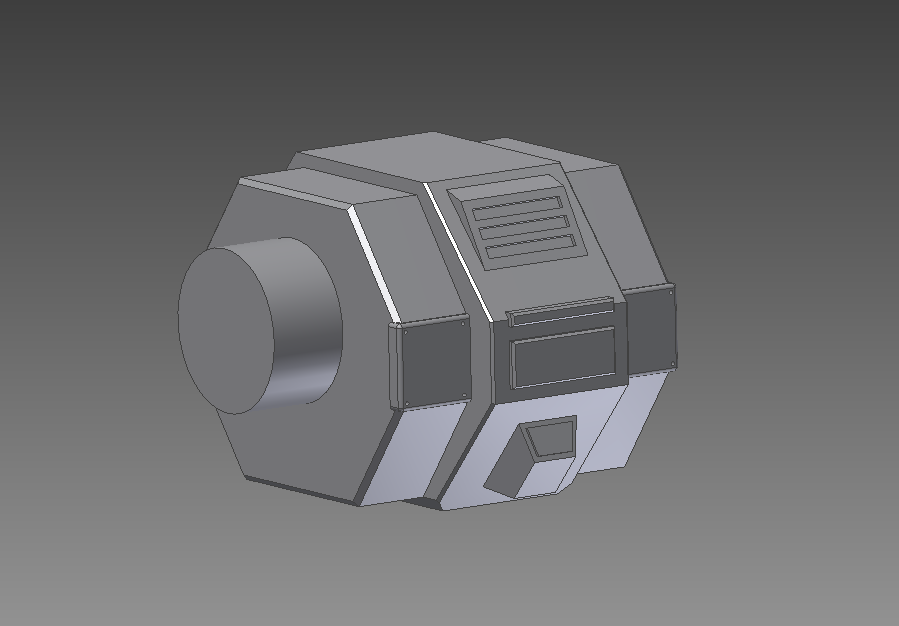
It looks good. Now
lets cut some grooves into that circle to give the appearance of that armored
look, with several panels like it has.
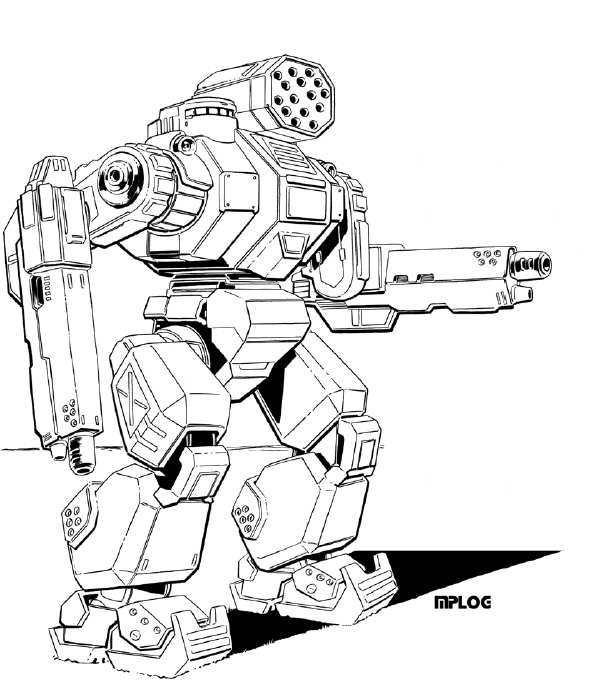
We’ll do 12 panels, to make it look like the art, but we may need to adjust
later.
First, the sketch:

Then the groove:

Then the rotational pattern to make 12 of them:

Looking good. We’ll
need to make a few detail oriented changes to match the art. I won’t go in depth on these, as it will take
me 200 words to go over something that won’t seem to make much of a difference.
The real key is though, that these small differences are
still important. It is the small details
that make a good model a great model.
That will make something worthy of a 3D printer. So take a look at my changes:

These small changes add realism to the model that wasn’t
there before. The corners of each armor
panel are now rounded, while the edges are now slanted over (chamfer, for those
who know CAD). I bumped out the center
the shoulder slightly to accommodate better joint with the arm.
Now I am going to make the shoulder cowl, and we will begin
on the laser mount above it. I switch to
wireframe view to get a better view of what is going on.

From there, I extrude, about 2.5mm, where the whole shoulder
assembly was about 3mm. This leaves just
a little of those armor plates exposed, giving some nice detail.
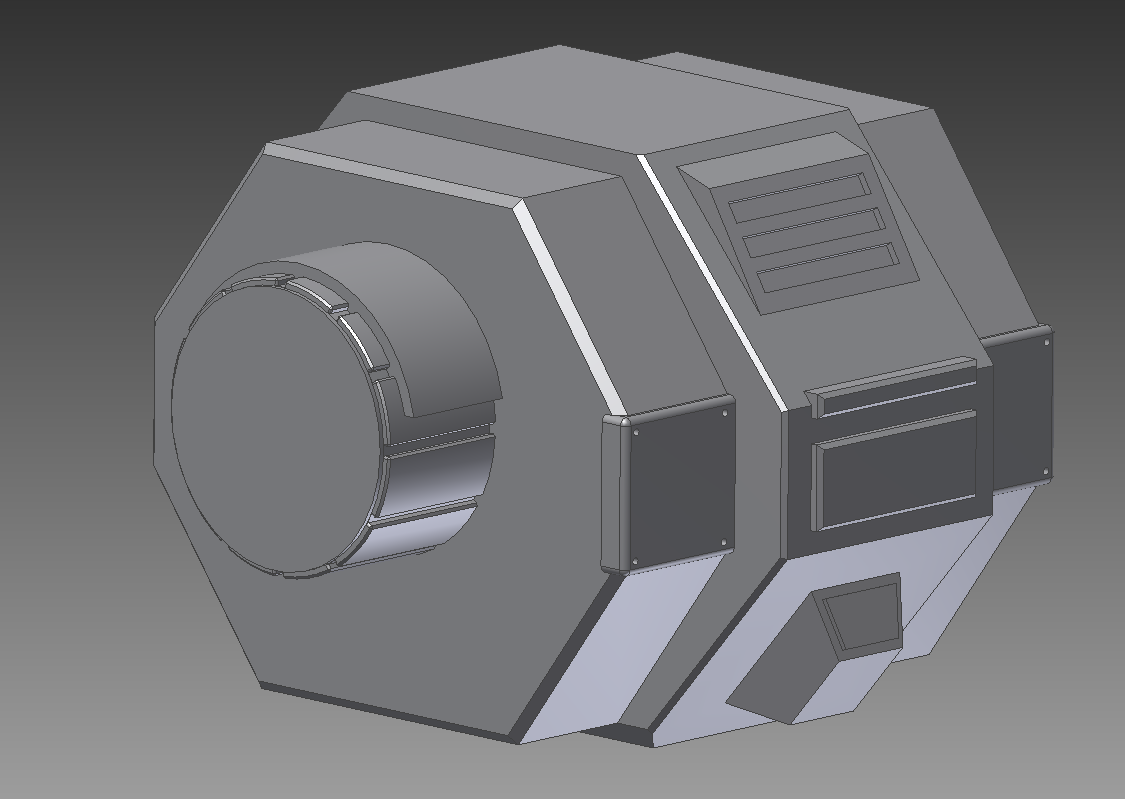
Lastly, I round over the corners and the edges to match the
artwork.

Next, it is time to work on those shoulder lasers. Each shoulder has a medium laser on top of
it, with a housing around it and a lens in the middle. These are going to be a little tough to
model, but if I use one of the origin planes to create the housing, it shouldn’t
be too tough.
First, the sketch:

Then the extrusion:

And finally, the details which would have taken too long to
explain:

Now, I am going to try and add some details which were not
immediately visible in the original art, but may add some more character and “roboticness”
to the ‘Mech. I am going to try and add power
cables to the back of the lasers. I am
not going to explain what I am going to do, I am just going to do it, and I’ll
explain after pictures:

That turned out much better than expected. We could call this section the power coupling
and cooling jacket for the laser. Either
way, it adds a nice bit of detail where there really wasn’t any of the original
picture. A glance at the back of the
original Dark Age miniature doesn’t have this, but I think it adds something to
the ‘Mech, so I am going to leave it.
I think that is all I am going to blog about today. I will be making a few more additions along
with some detail for the back, and we’ll get to the head and missile launcher
tomorrow!
No comments:
Post a Comment