Okay, so I am going to try and post about modeling in CAD
and maybe give a step-by-step on how I did it.
This is going to be a bit over-detailed, but I will get less
detailed as steps continue and my thought processes become more transparent.
So first, the source:
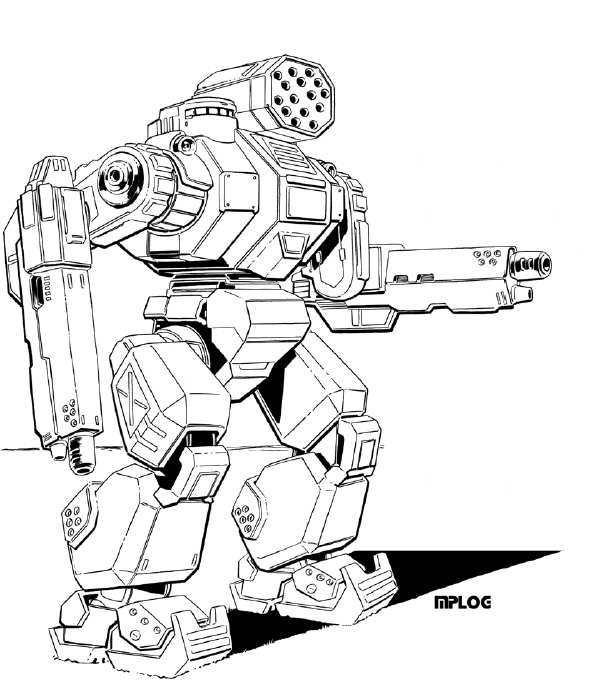
This 'Mech is a Thor II from BattleTech Technical Readout 3145: Clans. It was originally based of a miniature from MechWarrior Dark age, and then adapted to BattleTech just a few months ago. There is no current BattleTech scale miniature of this machine, so I hope to model it and then submit it. Let's see how it goes!
As you can see, this 'Mech has almost no curvy features beyond a simple circle here and there. Everything is very geometric with lots of flat sides. This is good, as it fits my CAD style quite nicely. I am not good with the curvy features, and will probably never model something with such until I get a bit more training.
As you can see, this 'Mech has almost no curvy features beyond a simple circle here and there. Everything is very geometric with lots of flat sides. This is good, as it fits my CAD style quite nicely. I am not good with the curvy features, and will probably never model something with such until I get a bit more training.
I am going to start with the center torso. Most ‘Mechs from the BattleTech universe are
divided into several parts: Center Torso, Side Torsos, Arms, Legs. You will see this model (and most of the art)
follow the same format, which makes logical points to design a model off
of. Starting in the center also creates
a good point from which to build all of the features.
Now I am going to be extremely detail oriented in this
model, and I hope to submit it to be made into a miniature, so every line,
bump, or small detail you see in that image above will most likely be making it
onto the model. I also will be drawing
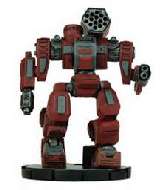
some details form the original MechWarrior Dark Age miniature, seen below.
For modeling, I use Autodesk Inventor. It is a relatively powerful CAD program, though not as powerful as some, such as CATIA or Unigraphics. I originally learned on CATIA, but due to the high cost of owning even a student version, I haven't used it outside of a work or school environment. Inventor is free for anyone with a .edu email address, and seeing that I am a masters student, it is an excellent opportunity to use this awesome and free software. Even better, when I am done with school, I have the option of purchasing a perpetual license for the software for around $150, which is a steal.
Enough with the details, lets get down the the model!
Let’s begin:
Enough with the details, lets get down the the model!
Let’s begin:
First, I start out with a simple trapezoid. The center torso gives me the feeling it is a
simple octagon, but I will be making half of it then mirroring it. To simplify the process.
The basic sketch includes some basic, arbitrary
measurements, but they serve for proportions.
Final measurements will be scaled up or down from these measurements.
Now I extrude it. I
make it a bit less than half the overall length.
And now I mirror it to make the full octagon.
Looking at this image and comparing it to the center of the
original image shows me the shape is too wide and the center flat part is not
tall enough. Let’s adjust.
I doubled the height of the center flat bit, and that made
everything seem more proportioned. It is
not perfect, but it is a solid start. I
may need to bump up the width later, or make further adjustments. We’ll see.
Now, I am going to make one of the side torsos. There is no point in making both of them
because they are both symmetrical. It
really smoothes out the design when I can mirror almost any detail over to the
other side. The only thing that can’t be
done via mirror is the top missile launcher and the head, both of which are no
big deal. Moving on…
The side torsos take the same shape as the center, just
smaller, so lets do it!
Here is the initial sketch:
And now the extrusion:
And the first mirror:
And the second mirror:
And we see that there are some things off with the
model. I am going to reduce some
sizes. The flat parts in the front are
currently 4mm tall, I am going to reduce that to 3. Same with the wide of the side torsos, also
to 3 mm. Lets see what it looks like
after adjustment:
There, much better.
Now lets add some of that center torso detail. I will be making most of the detail on the
right side of things and then mirroring it to the left. For most of the center stuff, I won’t need to
do that.
So, I won’t post the gritty details, but lets see what we
can do.
So I have added quite a few of the main details from the
drawing onto my model. This all in all
took me about half an hour to do, but it overall shows that the details can be
added in a
simple fashion. There were also
a few mirrors involved, mainly with the end-caps (I don’t
know what else to call
them) on the left and right torsos.
Now I will move onto the “Shoulders”, if they can be called
that. These present an interesting
challenge because of their various details, such as the “cowl” on the upper
part of the shoulder or the pattern of gaps on the arms also.
Once the shoulders are in place, I can also create the
lasers on top of the shoulders and the details below them.
It is of important note that this whole process took me a little more than an hour and a quarter, including taking the screenshots and writing this up.
But that will be for next time…


No comments:
Post a Comment