Wednesday, May 20, 2015

Nintendo's Issues (Or why they aren't making as much money as they could)


I love Nintendo. Great games, family friendly, just overall fun. I currently own every single one of their home consoles (though my NES is a retro clone), and I own a GBC and DS Lite, so the only games I currently cannot play from Nintendo are 3DS games.  My most recent acquisition was a Wii U and it is a wonderful piece of hardware. Quality controller, good software library, and the eShop is very nice.

Limiting Supply


But Nintendo has found many ways to try and irk me, and I don't quite understand why. Nintendo is the only company that limits the supply of their games and accessories. They are doing this even more so with their new Amiibo products, and I don't understand why.  

Let's use the example of Metroid Prime Trilogy. This game was a compilation of the 3 Metroid Prime games with the first 2 being updated to a wii control scheme. The game had a single print run and was only on shelves for probably 2 or 3 years, always at its original asking price of $50, never dropping.  Once it went out of stock, the game became unavailable.  Completely and totally unavailable.  Used copies would sell for upwards of the original asking price or higher.  The question is, why? If they could make this money by selling more, why don't they?

Now MP: Trilogy is actually a case where Nintendo came through for me, and released the game as a downloadable on the Wii U, and now I can finally enjoy MP: Trilogy for a reasonable price (I got it for $10, but it currently sits at $20).  

Other games have not been so lucky.  Games such as Xenoblade: Chronicles or Legend of Zelda: Skyward Sword have never gotten a reprint.  These games have not gotten a re-release via the eShop and simply remain incredibly difficult to get a hold of.  The cheapest used price for Skyward Sword on amazon is sitting at $41.  

This has been even more of an issue with the new Amiibo toys.  I can't seem to find a Samus Amiibo available for a decent price anymore now that I have a Wii U.  I was holding off and now I can't find it.  Same goes for at least a dozen other Amiibo designs and there is no good reason as to why Nintendo limits supply.  They don't get any benefit or make any more money when their product isn't available.  So why let them go unavailable?

Regional Differences


Now, as mentioned above, Nintendo has released some of their old Wii catalog onto the Wii U eshop.  Which is great news, and really, if it continues, will mean new life for some of these games that were made unavailable to Nintendo's supply limitations.  Also, given all current games need to be released to stores and the eshop simultaneously, we don't have to worry about these supply problems in the future, or so I hope.

Now the problem is region locks.  What are region locks? They are arbitrary locks that prevent games from one region (say, Europe) to be played on a console sold in another region (say, the US).  This goes a step farther and eshop games that are available in Europe may not be available in the US and vice versa. Why is this? I have yet to figure it out.  Just take a look at this list (handily compiled on Wikipedia) to see what I am talking about.

When Nintendo first announced that they were going to start releasing Wii games on the Wii U eshop, it generated a lot of buzz and they promised 3 games (Metroid Prime Trilogy, Super Mario Galaxy 2, and Punch-Out!!!) and they were all to be released one a week for 3 weeks.  Since those three games have been released in the US, not one other Wii game has been released in the US.  Europe on the other hand has had a consistent stream of new Wii games being released on their eshop.  At least 1-2 a month.  All of these games had disc releases in the US and are not widely available in the US either, but for some reason, they remain unavailable.  Games such as Kirby's Epic Yarn or Donkey Kong Country Returns are available for download right now in Europe, but not here in the States. The coding is obviously complete, and almost all European games have an english translation, so that can't be the cause.  Then Why? 

Other virtual console games have suffered from this, such as Metroid: Zero Mission (for the GBA) or others.  From wikipedia, we see that there are 5 more games released on the European VC than on the US VC.  Why the difference? I dunno. 


Even new releases, such as the new Yoshi's Woolly World, are available in Europe, right now, today, but not available in the US.  Heck, there isn't even a release date besides 3Q 2015.  And due to the region locks, I cannot order from amazon.co.uk and have it work in my Wii U.

Exclusive Extras


Another odd choice for Nintendo is limiting the release of many extra products to Club Nintendo subscribers only.  And given that Club Nintendo is shutting down, there will be no way to get these items. The soundtrack for Mario Kart 8? Only available to those in the Club.  How about a Golden Nunchuck to go with that Golden Wii remote you got in that cool Skyward Sword Bundle? Only available to Club Members.  Mario Kart 7 Trophies? Captain Toad Lamp? Soundtracks? DS Cases? All club nintendo exclusives.  I'd gladly plop down $10 to buy those soundtracks off of Amazon MP3, but they aren't available.  I would have spent extra to get that Nunchuck, but it wasn't available. It just flabbergasts me to think that they could have sold all of these things to me and didn't.


The Future

Who knows what is going to happen next, but it is obvious that Nintendo has some kinks to work out.  There is talk that the next system will not have region locks, but that does not make the current situation any better.  Will the US get more Wii games? Unknown. All I know about the situation is that I have a few hundred dollars I would be willing to give to Nintendo at this moment, but they for some reason have found reasons to make what I want unavailable.  The ball is in Nintendo's court, so let's see if they will pick it up and play, or just sit there.

Friday, March 20, 2015

Making of a Miniature, Part 1


So now that my designs are out in the wild (check this thread if you haven’t yet! ) and I wanted to give the community an idea on how the miniature design process works for me.  It varies from designer to designer, and from digital sculpting to traditional sculpting, but this is how I do it.

Now I want to start this off by saying that I am not an artist or even a CAD designer by trade.  I work my day job as a computer engineer and happened to pick up CAD work as part of an internship about four years ago.  Throughout the last few years I have worked in it on the side, but I really didn't do anything significant until the last year or so, when I made a Vulture III and a Thor II last winter.

Now I use Autodesk Inventor.  It is a mechanical CAD  program.  I know other designers use Dassault Solidworks (a Mechanical CAD), Autodesk Maya (a CAD program aimed at animation and video games) and Pixologic ZBrush (also an animation CAD).  Essentially, you have CAD that is for designing parts and CAD for computer graphics.  I come from the part design world.  My experience is in both Dassault CATIA and Autodesk inventor.  CATIA is an extremely high end software, which also makes it prohibitively expensive.  Inventor is free for anyone with a .edu email address, and since I am still taking master’s courses, it fits me perfectly, free.

Now because I work in mechanical CAD, rather than a Mesh or Node editor CAD, the way that I design my miniatures is different from how some of my colleagues may.  I start with 2D sketches and push and pull them into 3 dimensional objects.  Now, if you want an in-depth look at that exact kind of thing, take a look at my personal blog posts on designing the Thor II: http://randominterestsofanaverageman.blogspot.com/2014/02/the-making-of-model-part-1.html. 

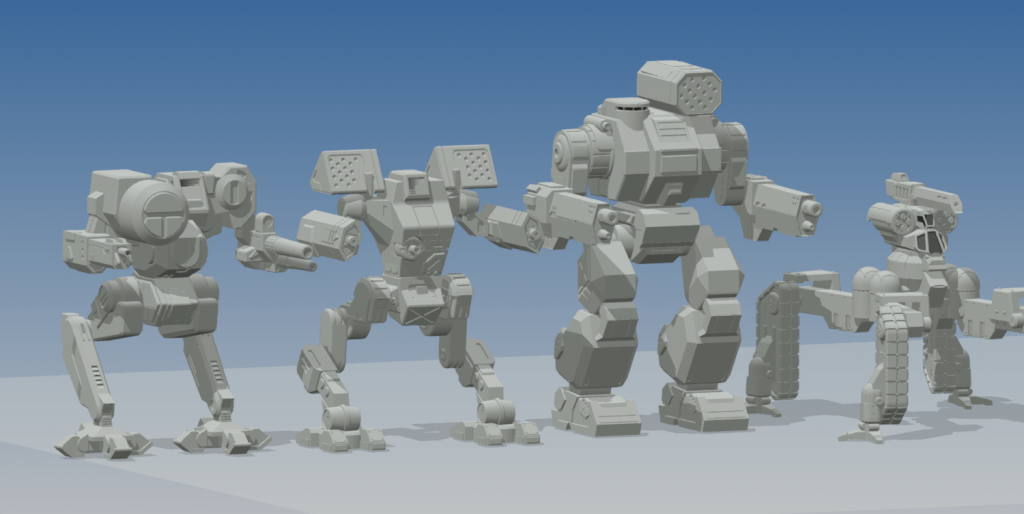
Now I have worked on four miniatures for IWM (5 if you include my not-accepted Vulture III), and they are a bit of a hodge-podge.  Thor II. Arctic Wolf II. Arion. Chimera.  Typically, IWM plans what minis they want to produce for the year, and then assign sculptors to work on them and get them released.  Anything that is not put on the schedule is added as an online exclusive.  So when I completed both the Thor and the Vulture, they were slated to be online exclusives.  Part of the reason for this also is that my CAD style hasn’t been perfected yet, and some designs, curvier designs, are still difficult for me to capture properly.

Moving on.

So now you know what software I use and why most of my work is Online Exclusives, so let’s talk about the designs I work with and the QCC process.

First things first, I pick a ‘Mech.  We all know what IWM’s release schedule is for the year, and what ‘Mechs have already been made, so I immediately remove them from my list of possible choices.  From there, I pick a ‘Mech that fits my CAD style.  Something a little blockier.  My first attempt was the Vulture III.  Very blocky, very geometric.  No smooth curves, no difficult to model surfaces.  The Thor II was also a solid choice in this respect.  The Arion also fit this style of mine, though to a lesser degree, and because of this, I hit a few snags, which I may or may not cover later.

Now, I also love Mechwarrior 4.  It is what got me into Battletech, got me into Miniatures, and started the downward spiral I call a hobby.  This game has also directed some of my designs here and it is the reason I chose both the Arctic Wolf II and the Chimera to work on.  The Arctic Wolf also happened not to have a miniature yet, and there definitely are some people looking forward to this mini.  The Chimera on the other hand, well, I just did not like the existing mini.  Tiny legs with a huge body, and a lot of the details I just felt were off.  So, I decided to take a crack at resculpting it.

Now, when I went into the Vulture and the Thor initially, I had no intention of doing alternate configs.  But when I always finishing the Thor, I saw the Dark Age mini, and saw the stats, and decided to make the missile box arms also.  From there, I have decided to make alt configs for all of my minis when they are available.  Meaning, if there is a reasonable alt config, my minis will probably include one of them at least.  We’ll go into more details on those when we start talking about the full QCC process, probably in part 2.


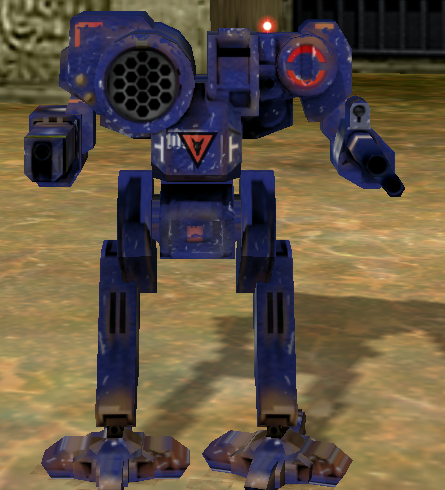
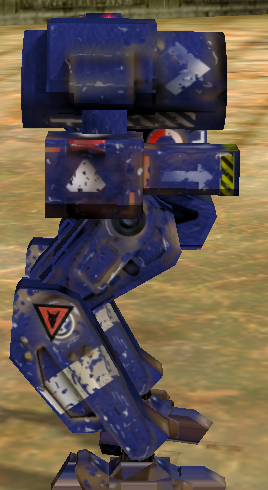
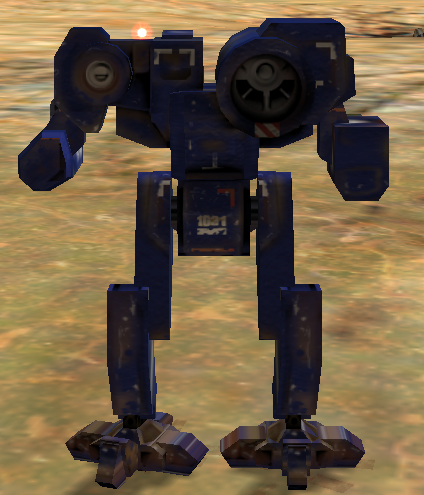
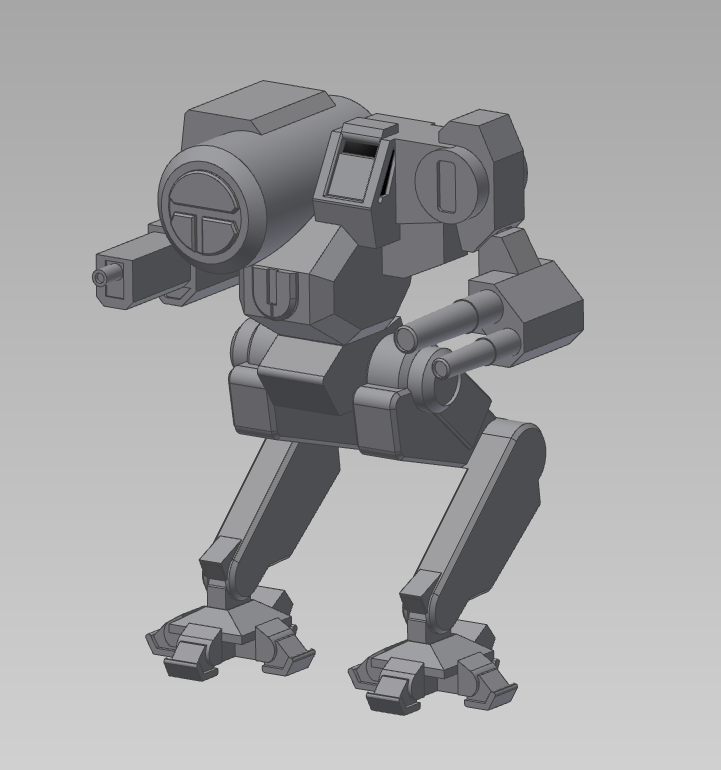
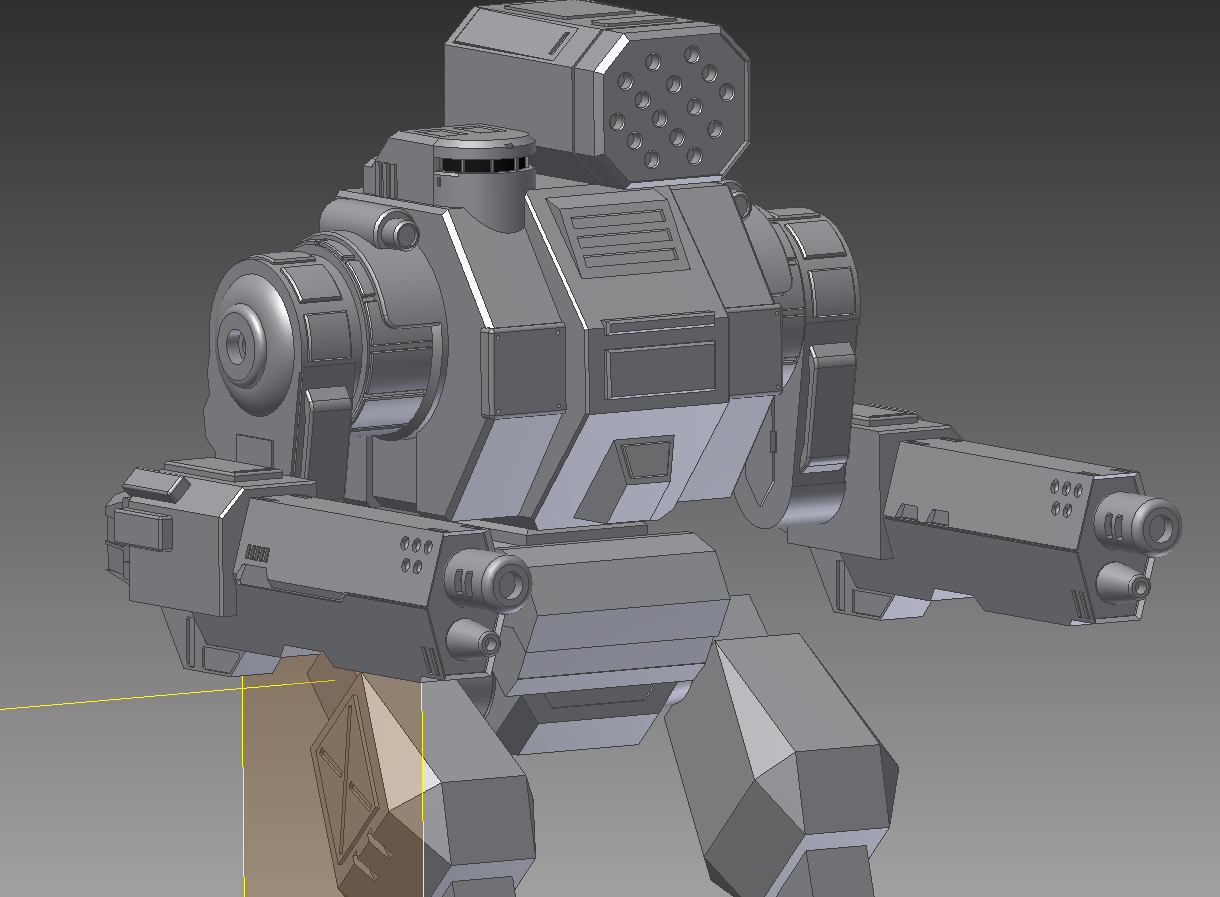
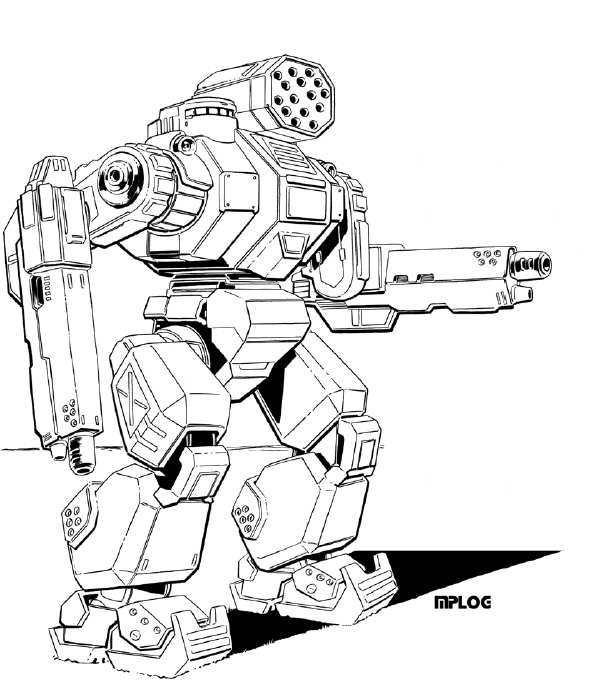
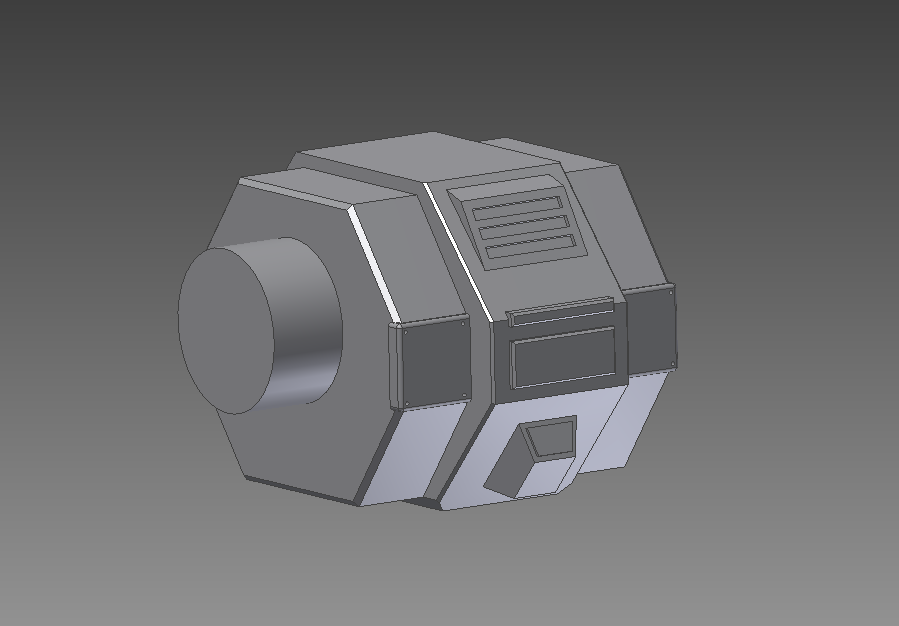
Typically, for CAD designers, we start making the entire miniature, but without any details on it.  We want to decide on the height of the mini, and make sure the basic proportions are dead on.  I will be using the Chimera as my example here.  I gathered as much source art as physically possible, which really isn’t much at all.  There is the TRO image, and luckily, this is a ‘Mech from Mechwarrior 4.  Even better yet, it was designed for Mechwarrior 4 and put into TRO: 3067 after that game was released.  So, I hopped into the game a took a few screenshots:


Also, I found an image from the Battletech Pods to use as a reference, this piece of art right here, which also conveniently lined up really good with the source art:


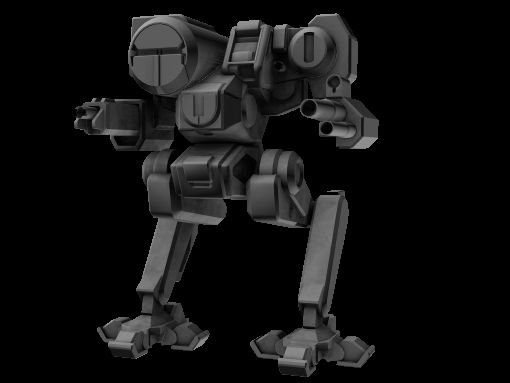
From there, I made my first run at the basic shape of the mini, check it out:


This is what I showed IWM when I asked if they wanted to resculpt the mini, and it is what was first submitted to the quality forum for my peers to review. You can quite obviously tell that there are some issues with this block out.  Small legs are the immediate issue, but there are more.  The IWM quality forum helped me get rid of some of these problems.


What did they have to say? Well, that will have to wait for part 2…

Friday, May 16, 2014

Installing X-Wing and TIE Fighter Collectors Editions, Legally!


So, there has been a lot of talk on the internet about installing the old X-Wing and TIE Fighter PC games.  So I thought I would post a guide on how to install the games (mostly) legally.

Recently, the Internet Archive released a library of pack-in and demo disks.  After searching through it, I found that both X-Wing and TIE Fighter Collectors editions were included, and these were the good ones, the DOS/Win 95 packs.  Take a look at the CD Archive here. Both X-Wing Collectors Edition and TIE Fighter Collectors Edition were included.  The download links are on the left hand side of the screen.

The Internet Archive has long been a reputable site, so I wouldn't worry about the legality of these files.  The have plenty of opportunity to take them down and these files are available publicly.

Once you have downloaded the .iso file for each disc, move them to a folder on your PC somewhere near the root of your drive.  I like to create a folder C:\OLDGAMES, and then create a subfolder called ISO.  Copy your .iso files there.

Now, we need DOSBox.  If you are on windows, check out this link to download.  If you are on Mac OS or Linux, just check out the DOSBox website.  Once installed, open the program and you get a nice DOS Prompt.

I don't have access to my main PC right now, so we will have to do without screenshots until I can update this later.

Open dosbox, and enter the following commands:

     mount C: C:\OLDGAMES
     imgmount D: C:\OLDGAMES\ISO\XWINGCD.iso -t iso -fs iso

To Install the game, now type these commands:

     D:\
     setup  (it may be install, but I am not complete sure, will update later)

Follow the standard install, make sure to test the audio and set the soundcard to a SoundBlaster 16, as this is DOSBox's default.

Now everything should be installed, so let's play!

Type:
     C:
     cd xwingcd
     xwing  (might be xwingcd)

And you are set!  You can  play with keyboard and mouse or a joystick, and that joystick should be automatically detected by DOSBox.

Now, whenever you want to play, open dosbox, and enter these commands:

     mount C: C:\OLDGAMES
     imgmount D: C:\OLDGAMES\ISO\XWINGCD.iso -t iso -fs iso
     C:
     cd xwingcd
     xwing  (might be xwingcd)

If you want to play full screen, make sure to press ctrl+enter.  To exit, exit through the games menus and then type exit at the DOS Prompt.


Now, TIE Fighter sometimes has joystick issues, so there is a patch out there to fix that.  Its is available from Lucasarts I believe.  Download that patch, dump it in the C:\OLDGAMES\TIECD folder, and then run it from the dos prompt.  Should fix any issues.

Make sure you leave any questions/comments in the comments section!

Monday, May 12, 2014

A Morning Sunrise


It is a strange world we live in today.


Though given this beautiful world, many choose to escape it.  To enter into our own little (mostly digital) worlds, and hide away from that which is happening around us.

Now, don't take me wrong, I do this same thing myself time and time again. Just take a look at this Blog and you will see how obvious that is.

But on my drive in to work this morning, I was lucky to catch my favorite part of the sunrise.  The official sunrise time for this morning was 6:13.  But around half an hour before sunrise, on mornings with some clouds in the sky, the sun lights the clouds from below, instead of above.  

This creates some beautiful crimson reds, that spread only on the tips of the ridges of the clouds, as if someone has taken a brush and grazed a thing layer of paint over those edges.

Further down the horizon, before we even reach the clouds is a brilliant pool of red and orange light, the pot from which the brush is dipped.  

To the left, on this particular day, the cool white light of the moon perforates the clouds, lending to an odd mixture of warm and cold light that will be washed away by the coming sun.

Not my photo, but pretty much what I was inspired by.  Mine photo had a lot more blur, cars, and power lines in the way.

It is in times like these, scenes like these, that I take a second to look at the world God has given us.  The world that we have been blessed with.  It is a reminder that there is so much more than our little worlds we build for ourselves.  So much more than the here and now.

As I look out onto this beautiful scene, I say a silent prayer thanking the Lord for my life and everything and everyone in it.

Wednesday, February 12, 2014

Update on Model

 Okay, so long post like I had before are quite time consuming, and then I got focused on making the model, and playing some games, and school work, and well, everything.  So blog posts went by the wayside.  With that, I want to make a quick update on the state of the model.  I have the entire upper half complete.

I just finished the hips today and have a start of the legs, though they may not be bulky enough at this point in time.  Also, the head seems a bit small and the arms seem a bit big.  If anyone has any opinions, they would be greatly appreciated.

Lastly, I want to mention that this is actually my second modeling project and my first is actually in review with Iron Wind Metals right now, so I have already been in contacted with the original artist, Matt Plog.  So I will also be reviewing the model with him when I am done.

Without further ado, here is the model at 65% complete :) 

Saturday, February 8, 2014

The Great Monitor Upgrade

So this is going to have a completely unnecessary analysis of monitors.  Beware.

I am going to be upgrading my PC monitor and graphics card soon, I have been debating for quite a while which setup I am going to use:  a 21:9 29" monitor or 3 20" standard widescreen monitors.

There are quite a few factors, such as Resolution, screen area, screen height, and price.

So, first, the competitors: three HP 20xis vs an AOC Q2963PM. 
(I can't get blogger to put these side by side)

The 20xi is currently priced at $99.99 while the Q2963PM is $379.99, making the triple HPs a better deal by over $80, but there are some issues with this.  Namely, resolution.

Each 20xi has a resolution of 1600x900, making three of them a total of 4800x900, or about 4.3 Megapixels at an aspect ratio of 16:3.  The Q2963PM has a resolution of 2560x1080, or 2.75 Megapixels, at an aspect ratio of 21:9, or 7:3. Lower resolutions equal lower necessary graphics power.  Lower graphics power means cheaper card when I buy it for upgrades.  The more expensive required graphics card nullifies the cheaper monitors pretty much off the bat.  I can get a GTX 760 for around $235, which would work great for the 21:9 screen, but I would probably need a more powerful GTX 770 for the triple monitor setup. If I were to bump up to bigger screens, like a 23xi, with a resolution of 1920x1080, I simply would not have enough horsepower to run games at 5760x1080, which is nearly 6 Megapixels.  

Now, screen area.  A nice website I have found for comparing screen area is Display Wars.  They provide some very nice comparisons of screens along with all of the numbers, so you don't have to calculate them yourself.  Look here for the comparison of the two screen sizes.  We can see that the 21:9 screen has an area of 304.5 sq. in. while the 20xi has an area of 170.9 sq. in.  This makes a single 21:9 screen have the same area as about 1.75 20xis.  Not bad, but cost wise, not good either.  The 21:9 is not looking like a good bang for my buck.

Now, a concern brought up to me out on the HardOCP forums was vertical height.  And I thought to myself, yeah, that makes sense.  The smaller screens are going to have less vertical height and it won't be as good for gaming.  But in looking closer at the displaywars numbers, I notice the stats.  20xi height: 9.81 inches.  Q2963PM height: 11.42 inches.  A difference of only 1.61 inches.  Now it is looking like a lot less that I originally envisioned.  1.61 inches, about 4 centimeters.  Can it make that much of a difference?

Finally, there is the inherent advantage of having a single large screen over several smaller ones.  Videos on youtube can be 1080P.  Games that can only run on 1 screen look better.  Better for things such as CAD work or even document writing sometimes.

My final consideration is mounting my original monitor above the 3 20xis, but I don't know if this is possible.

I will be buying in a month or two, so I have some time to decide...

Tuesday, February 4, 2014

The Making of a Model Part 2

The Making of a Model Part 2


Okay, I left off yesterday with the shoulders, and lets just jump right into it.

First off, we are going to make a quick circular sketch on the right side flat part.  Like so:


We extrude it out, and lets see how it looks:


It looks good.  Now lets cut some grooves into that circle to give the appearance of that armored look, with several panels like it has.  We’ll do 12 panels, to make it look like the art, but we may need to adjust later.

First, the sketch:


Then the groove:


Then the rotational pattern to make 12 of them:


Looking good.  We’ll need to make a few detail oriented changes to match the art.  I won’t go in depth on these, as it will take me 200 words to go over something that won’t seem to make much of a difference.

The real key is though, that these small differences are still important.  It is the small details that make a good model a great model.  That will make something worthy of a 3D printer.  So take a look at my changes:


These small changes add realism to the model that wasn’t there before.  The corners of each armor panel are now rounded, while the edges are now slanted over (chamfer, for those who know CAD).  I bumped out the center the shoulder slightly to accommodate better joint with the arm.

Now I am going to make the shoulder cowl, and we will begin on the laser mount above it.  I switch to wireframe view to get a better view of what is going on.


From there, I extrude, about 2.5mm, where the whole shoulder assembly was about 3mm.  This leaves just a little of those armor plates exposed, giving some nice detail.


Lastly, I round over the corners and the edges to match the artwork.


Next, it is time to work on those shoulder lasers.  Each shoulder has a medium laser on top of it, with a housing around it and a lens in the middle.  These are going to be a little tough to model, but if I use one of the origin planes to create the housing, it shouldn’t be too tough.
First, the sketch:


Then the extrusion:


And finally, the details which would have taken too long to explain:


Now, I am going to try and add some details which were not immediately visible in the original art, but may add some more character and “roboticness” to the ‘Mech.  I am going to try and add power cables to the back of the lasers.  I am not going to explain what I am going to do, I am just going to do it, and I’ll explain after pictures:


That turned out much better than expected.  We could call this section the power coupling and cooling jacket for the laser.  Either way, it adds a nice bit of detail where there really wasn’t any of the original picture.  A glance at the back of the original Dark Age miniature doesn’t have this, but I think it adds something to the ‘Mech, so I am going to leave it.


I think that is all I am going to blog about today.  I will be making a few more additions along with some detail for the back, and we’ll get to the head and missile launcher tomorrow!

Monday, February 3, 2014

The Making of a Model Part 1

Okay, so I am going to try and post about modeling in CAD and maybe give a step-by-step on how I did it.

This is going to be a bit over-detailed, but I will get less detailed as steps continue and my thought processes become more transparent.

So first, the source:


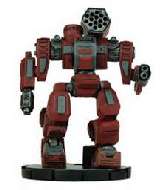
This 'Mech is a Thor II from BattleTech Technical Readout 3145: Clans.  It was originally based of a miniature from MechWarrior Dark age, and then adapted to BattleTech just a few months ago.  There is no current BattleTech scale miniature of this machine, so I hope to model it and then submit it.  Let's see how it goes!

As you can see, this 'Mech has almost no curvy features beyond a simple circle here and there.  Everything is very geometric with lots of flat sides.  This is good, as it fits my CAD style quite nicely.  I am not good with the curvy features, and will probably never model something with such until I get a bit more training.

I am going to start with the center torso.  Most ‘Mechs from the BattleTech universe are divided into several parts: Center Torso, Side Torsos, Arms, Legs.  You will see this model (and most of the art) follow the same format, which makes logical points to design a model off of.  Starting in the center also creates a good point from which to build all of the features.
Now I am going to be extremely detail oriented in this model, and I hope to submit it to be made into a miniature, so every line, bump, or small detail you see in that image above will most likely be making it onto the model.  I also will be drawing some details form the original MechWarrior Dark Age miniature, seen below.


For modeling, I use Autodesk Inventor.  It is a relatively powerful CAD program, though not as powerful as some, such as CATIA or Unigraphics.  I originally learned on CATIA, but due to the high cost of owning even a student version, I haven't used it outside of a work or school environment.  Inventor is free for anyone with a .edu email address, and seeing that I am a masters student, it is an excellent opportunity to use this awesome and free software.  Even better, when I am done with school, I have the option of purchasing a perpetual license for the software for around $150, which is a steal.

Enough with the details, lets get down the the model!

Let’s begin:

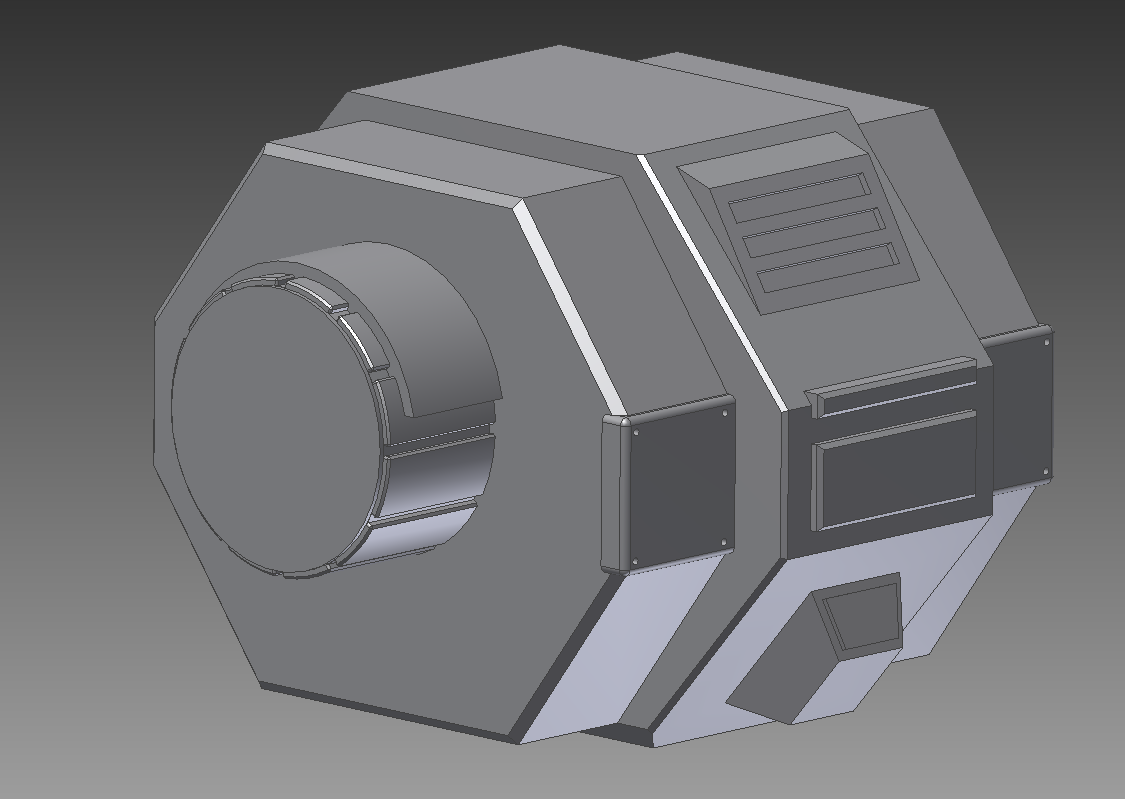
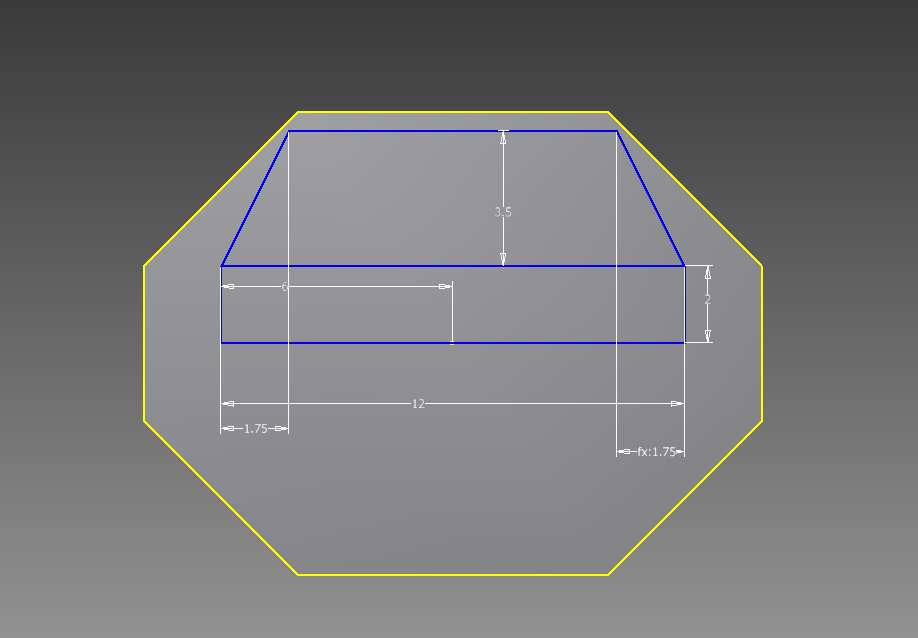
First, I start out with a simple trapezoid.  The center torso gives me the feeling it is a simple octagon, but I will be making half of it then mirroring it.  To simplify the process.
The basic sketch includes some basic, arbitrary measurements, but they serve for proportions.  Final measurements will be scaled up or down from these measurements.


Now I extrude it.  I make it a bit less than half the overall length.


And now I mirror it to make the full octagon.


Looking at this image and comparing it to the center of the original image shows me the shape is too wide and the center flat part is not tall enough.  Let’s adjust.


I doubled the height of the center flat bit, and that made everything seem more proportioned.  It is not perfect, but it is a solid start.  I may need to bump up the width later, or make further adjustments.  We’ll see.

Now, I am going to make one of the side torsos.  There is no point in making both of them because they are both symmetrical.  It really smoothes out the design when I can mirror almost any detail over to the other side.  The only thing that can’t be done via mirror is the top missile launcher and the head, both of which are no big deal.  Moving on…

The side torsos take the same shape as the center, just smaller, so lets do it!

Here is the initial sketch:


And now the extrusion:


And the first mirror:


And the second mirror:


And we see that there are some things off with the model.  I am going to reduce some sizes.  The flat parts in the front are currently 4mm tall, I am going to reduce that to 3.  Same with the wide of the side torsos, also to 3 mm.  Lets see what it looks like after adjustment:


There, much better.

Now lets add some of that center torso detail.  I will be making most of the detail on the right side of things and then mirroring it to the left.  For most of the center stuff, I won’t need to do that.

So, I won’t post the gritty details, but lets see what we can do.


So I have added quite a few of the main details from the drawing onto my model.  This all in all took me about half an hour to do, but it overall shows that the details can be added in a 
simple fashion.  There were also a few mirrors involved, mainly with the end-caps (I don’t 
know what else to call them) on the left and right torsos.

Now I will move onto the “Shoulders”, if they can be called that.  These present an interesting challenge because of their various details, such as the “cowl” on the upper part of the shoulder or the pattern of gaps on the arms also.

Once the shoulders are in place, I can also create the lasers on top of the shoulders and the details below them. 

It is of important note that this whole process took me a little more than an hour and a quarter, including taking the screenshots and writing this up.

But that will be for next time…

Sunday, January 12, 2014

The Legend of Zelda is Awesome

So a lot has happened and I have obviously not updated this blog since its inception back in July.  But that is the nature of my Random interests.  Apparently blogging was one of them.  So I am now back to being randomly interested in blogging, and I have done a lot over the past few months, I hope to be updating the blog here a few times.  Though I doubt I will be consistent or even update outside of this one post.


With that, let’s get right off and talk about the Legend of Zelda.  Awesome games, though I have not played them all.  I wouldn’t call myself a super-fan, though I did go to the Zelda Symphony (which was totally awesome).  Though there are many Zelda games (a quick check of Zelda Dungeon tells me there are 17 games) I have only completed four of them, and I am halfway through a Link to the Past and I do have access to Majora’s mask.

The question is, why are they so entertaining? Why are these games something someone comes back to time and time again?  I think this really comes down to the basics.  Adventure. 

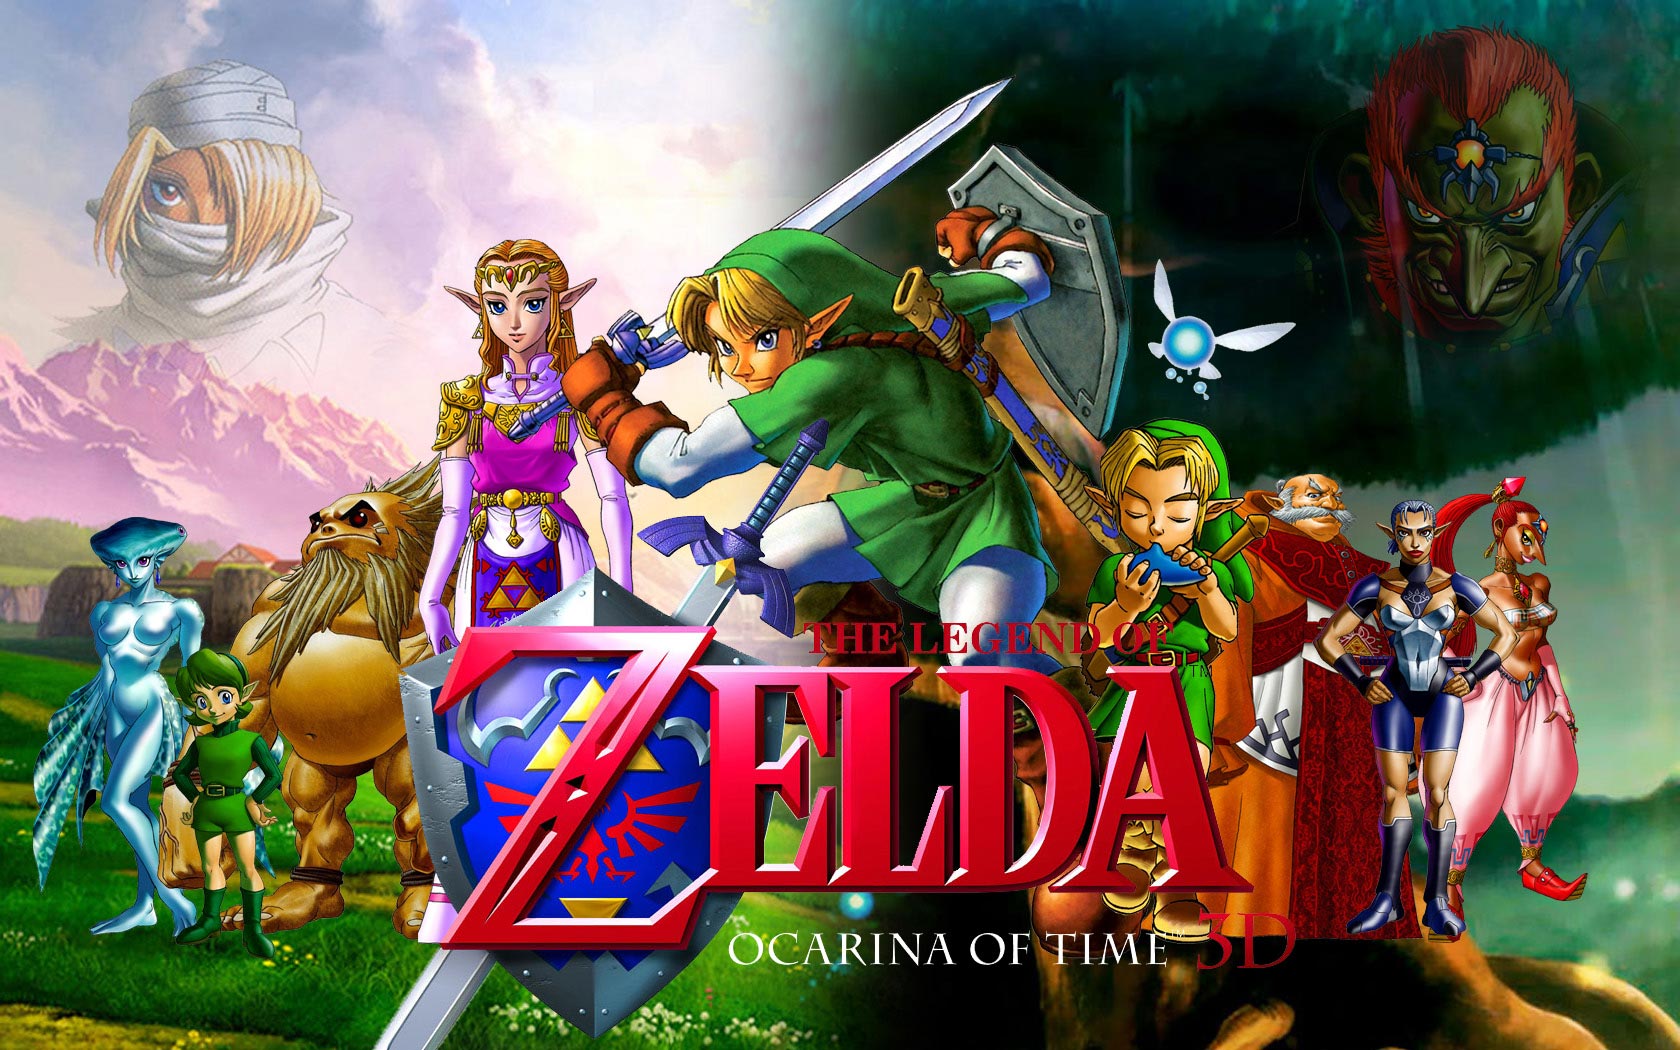
If you were 10 years old and was asked to describe and a mystical adventure, it would sound a lot like Legend of Zelda.  Collect the pieces of the puzzle, save the princess, defeat the evil monster bad guy.  It plays on everyone’s basic need to play pretend and it wraps it all up with a very nice universe at the same time.  The games always have a similar feel to them, yet they each feel different at the same time.  Twilight Princess is Dark, and Majora’s Mask even Darker.  Ocarina of Time is what I would consider the “Average” experience, have both light-hearted moments and dark moments, and it is the ultimate, if not basic, hero quest.  A Link to the Past is similar, while Wind Waker is a bouncy fun version, though it is no less awesome.

Now, many claim that these games are best played because of their nostalgia, playing the games 10 or more years ago, and remembering them as children.  Many would claim that they are not as good now as they were then, but I wholeheartedly disagree.  And that is because I never played these games as a child. 

I played my first Zelda game in 2009 with Ocarina of Time for Wii Virtual Console.  I had a few memories of seeing someone else play the game from many, many years ago, but that was short.  But those few minutes (an hour maybe?) was what inspired me to try the game for the first time.  And was it great.  I must have played 15 hours in the first week (a lot for me, especially at the time).  When the game had concluded, and Ganondorf had been defeated, it was the end of a truly excellent ride.  I went on to play Wind Waker a few months later, and then Twilight Princess not long after that.  All great games, all great adventures.

If you haven’t played any of these games yet, it is highly recommended.  There are plenty of illegal ways to try out these games, but I don’t recommend them and you can find them for yourself.  Otherwise, if you have a wii, go for the virtual console versions, if not, find an N64 and Ocarina of time for sale and pick it up.  It is always best playing the games how they were originally meant to be played.  Though, to be honest, a used wii and $10 for the virtual console version may be cheaper.


Either way, make sure to check it out.

Friday, July 19, 2013

Preview of Upcoming Posts

A preview of some upcoming posts: (this preview is more for my benefit, as I forget ideas as I come up with them).

Painting Miniatures: There is an upcoming miniature painting competition over at the BattleTech forums, and I am going to submit a piece.  Here is a link to the thread!  And here is a link to the competition from last January, of which I won in the amateur division!   I will hopefully be going over everything from building the mini, through painting it and putting it on a base (or basing it, as they say).  Look for this one next month.

More Halo Weapon Comparisons: I hope to do quite a few more of these in the coming months, including, but not limited to, Pistols, Sniper Rifles, Shot Guns, and Plasma Rifles.  I think pistols will be next on my docket, because there are so many of them (6, compared to only 4 assault rifles) and then Plasma Rifles, because they are probably my favorite weapon of the series and there are also 7 of them, if you include the brute plasma rifle variety.

Lawn Patterns and the Study There of: I always get bored with a standard straight line pattern of mowing the lawn, so I usually like to mix it up a bit, and try and save time at the same time.  This has led me to the spiral, the wave, and a few other unique lawn cutting patterns.  I also hope to get a little math into the equation (no pun intended) and go over time benefits (or costs) of doing various patterns.

Every Man Needs Tools: A list of things men will always need, no matter how handy they are.  Dudes need tools, it’s just the way of that.  This will cover essential skills and physical tools needed for a man to live on his own, or with a girl who doesn’t know squat about fixing things (cough my wife cough cough). 

Why PC gaming is awesome, but not the only way to play: I love PC gaming.  Always have.  I have some history behind this, but I also want to say that I am a console fan (well, no playstation, but the rest).  This one will be about how gaming on the PC can be one of the best experiences if you are playing by yourself, but also on why consoles are necessary for a complete gaming experience.  Also, I hope in the future to go into computer building, which is a fun and great experience in and of itself.


And that should cover me for the next month or two!  I think I am going to be starting on a few of them simultaneously, but you’ll see at least one in the next week!

Tuesday, July 16, 2013

Model Rockets are Awesome.

A hobby of mine for many (many) years has always been model rocketry.  It is not an extremely common hobby outside of boyscouts and after school science clubs, but it is actually a lot of fun.  My dad used to enjoy rockets when he was young, and then he spread the hobby to my brothers and I when we were young.  Over the years I have collected and built upwards of 20 rockets and they are always a blast (pun intended).

Model rockets are not fireworks.  They are far more expensive and they take more time and effort, but they are also very rewarding when you see your rocket come down on its parachute and land into your hands.  Most rockets are made by the Estes company, which owns probably (my guess, not real numbers) 90% of the model rocket industry.  They sell ready to fly and build them yourself rockets of all shapes and sizes, and they sell the engines for them. 

So, if you didn’t know, model rockets operate on a few simple principles.  First, the engine will push the rocket up hundreds of feet.  Rockets are rated with letters, A-E for the common ones, and even up to the letter P for more professional rockets.  Farther the letter is down the alphabet, the more power it has.  I have only used rockets with engines A-E.  Anyways, once the propulsion is used up, there is a small delay, anywhere from 2-10 seconds of smoke charge, then there is the ejection charge. 

Most engines have rating numbers like B6-4 or C6-7.  The engine ratings are based on impulse, which is a measure of Force times time.  The second number is the average force of the engine in newtons.  So a C6 and a B6 have the same average force but the B6 burns for less time than the C6.  The last number is the smoke delay in seconds.  Here it is laid out on Wikipedia.

Launching them is obviously the best part.  Range is anywhere in between 400ft to almost 2000ft for multistage rockets.  The only disadvantage is the need for a large area to launch the rocket.  Our favorite has always been the local high school parking lot.  The key is to have enough running room to go and catch the rocket and also not lose it in a field of grass. 


If you haven’t had a chance to light rockets, it is a lot of fun.  I will admit I am beginning to ramble, but go out, drop $20 bucks and try it out.  I highly recommend it!

Saturday, July 13, 2013

The Great Assault Rifle Debate


Okay, so my recent halo post was less than stellar in the writing department, and I knew that.  So let’s start on a new foot.  So I am going to write another Halo based post!  This one a bit more specific.

This is a topic only serious fans may have considered.  Which Halo’s Assault Rifle is the best?

Now, let’s take a quick look at the contenders.  We have Halo 1, the 60-round inaccurate death spewer, Halo 2, oh wait, there was no assault rifle in Halo 2, Halo 3, with its drastically improved 32-round accurate rifle, Halo Reach, with its gritty powerful rifle, and Halo 4, with the jack-all-trades rifle.  Each of these weapons are different, with Halo 1 being the most unique, and the other 3 being the bread and butter of the halo games.  The links I provided are to Halopedia, and each article compares the rifle to the previous rifle that came before it.  I will use these to help out my description, but also, how the weapon plays in a game and how it “feels” in my opinion, will also be looked at.

First, a few comments on the rifle itself.  It is notable that the gun is completely unrealistic for the sake of gameplay.  They do try and give it realistic stats to compare it to modern weapons, but compared to modern weapons, I would take the 50 year old AK-47 over a Halo assault rifle any day of the week.  The weapon (all of them ) fire M118 7.62x51mm Full Metal Jacket Armor-Piercing ammunition.  For reference, that link I gave you is for the Wikipedia article on the real ammunition.  Why would we be using the same ammunition 500 years from now?  It makes no sense really…   In my opinion, the Halo universe should be taking place in 2150, not 2550.  But anyways, continuing.  Now, AK-47s do use a smaller, less powerful round than the M118, but they do have an effective range of over 400m.  Most Halo maps are only about 200m across, and those assault rifles aren’t worth a darn at a range of more than 50m.  You’d think with 500 years to advance technology, they’d have some way to shoot a little further.  Of course, also, if the game was played by firing rounds at each other from a range of 500m, it wouldn’t be very fun, would it?

Now, let’s look at the guns.  First up, Halo 1.


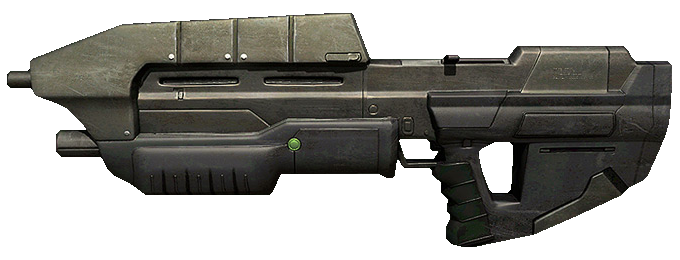
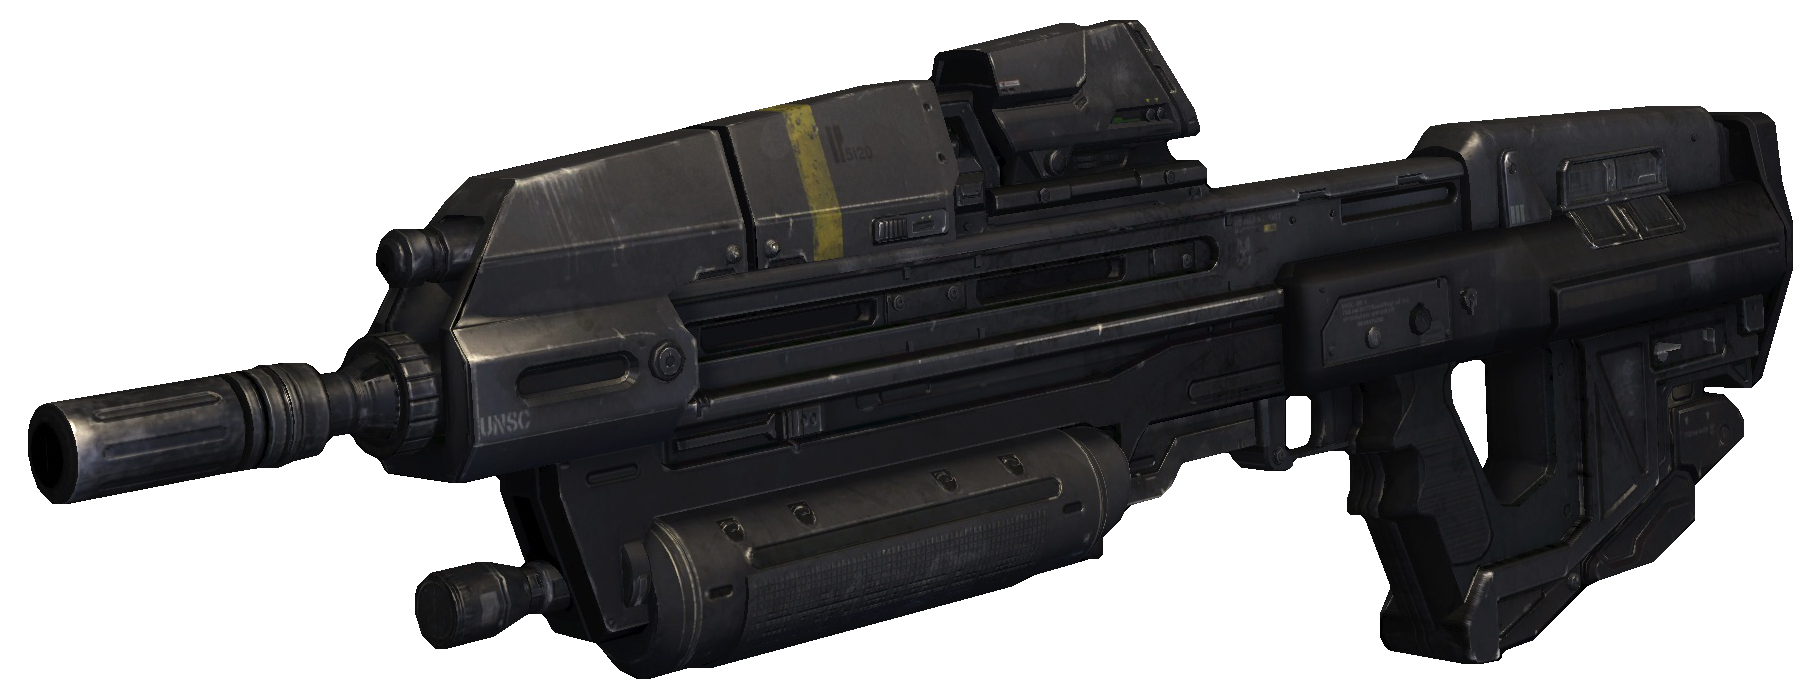
The original Halo Assault Rifle, the MA5B, was more like a sub-machine gun instead of a rifle.  It had 60 rounds per clip, and emptied said clip in about 4 seconds (at 15 rounds a second).  It was an effective tool at close range, but was usually left behind for a more effective gun, such as the famed Halo 1 pistol (the M6D, if you were wondering).  It was excellent in Campaign mode against the Flood, second only to the shotgun, and was a great weapon against unshielded enemies.  Problem is, the hard guys have shields, and on harder difficulties, their shields just get better, which makes the gun useless against covenant on heroic or legendary difficulty.  Always effective against Flood infection forms, the weapon left a lot to be desired. 

For multiplayer, the gun was used as a default weapon for many maps, but it just didn’t cut it, and was commonly dropped for a better gun as soon as one came around, such as the pistol or shotgun.    But, it did have an advantage.  At close range, it only took 16 bullets to kill an opponent, which only is a quarter clip and that is quite fast.  I confirmed this by starting a multiplayer match on the map Rat Race, which has covenant deployable shields, which reflect assault rifle rounds at close range.  It does appear that it is only 16 shots.  I will confirm on my xbox later.  Problem comes as the accuracy is bad at any range over a few dozen meters.  Good luck landing 16 shots in a row at any difficulty.

The Halo 1 rifle does have the pluses of being the original and a lot of fun as a “spray and pray” weapon.  My wife and I have been playing campaign, and she has been loving just running into a crowd of enemies and mowing them all down.  This tactic, though fun, usually gets her killed.


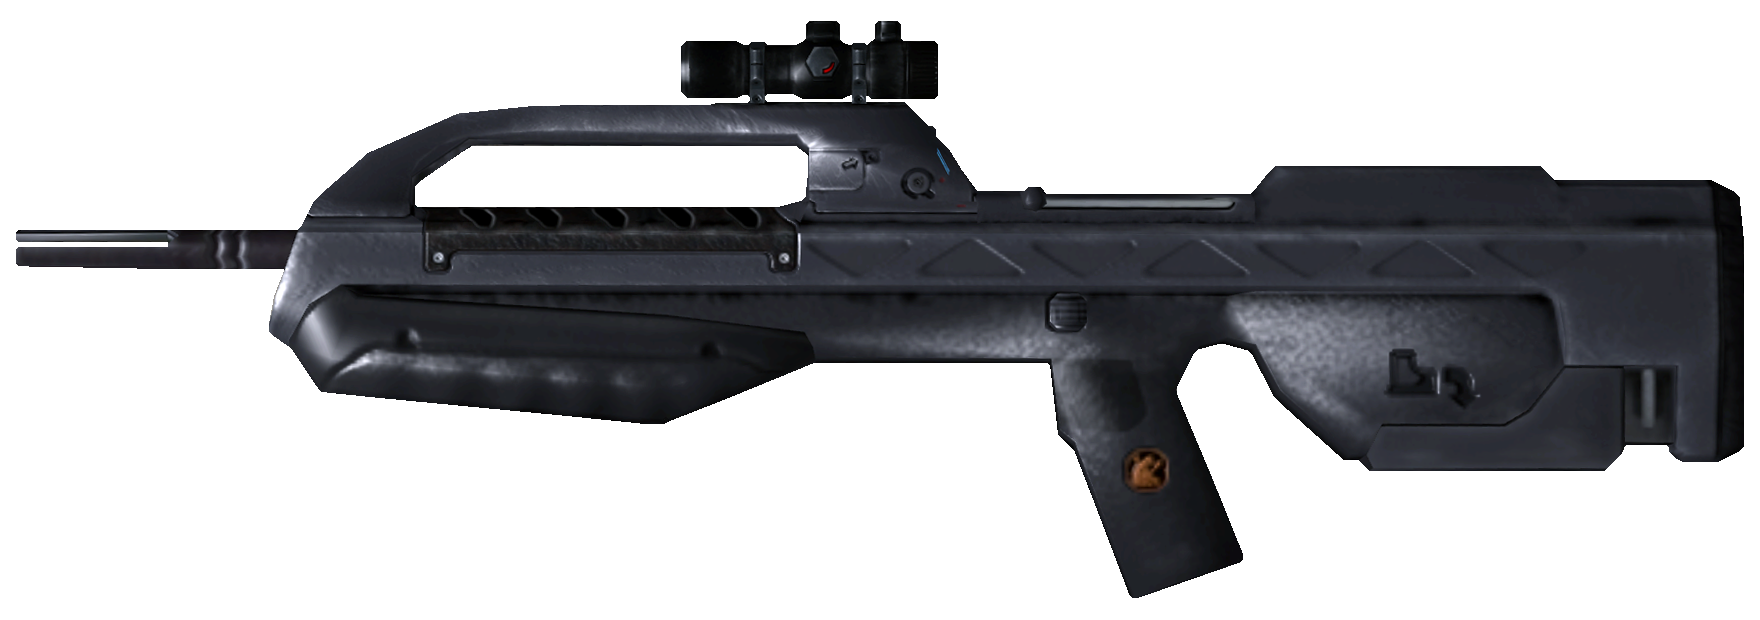
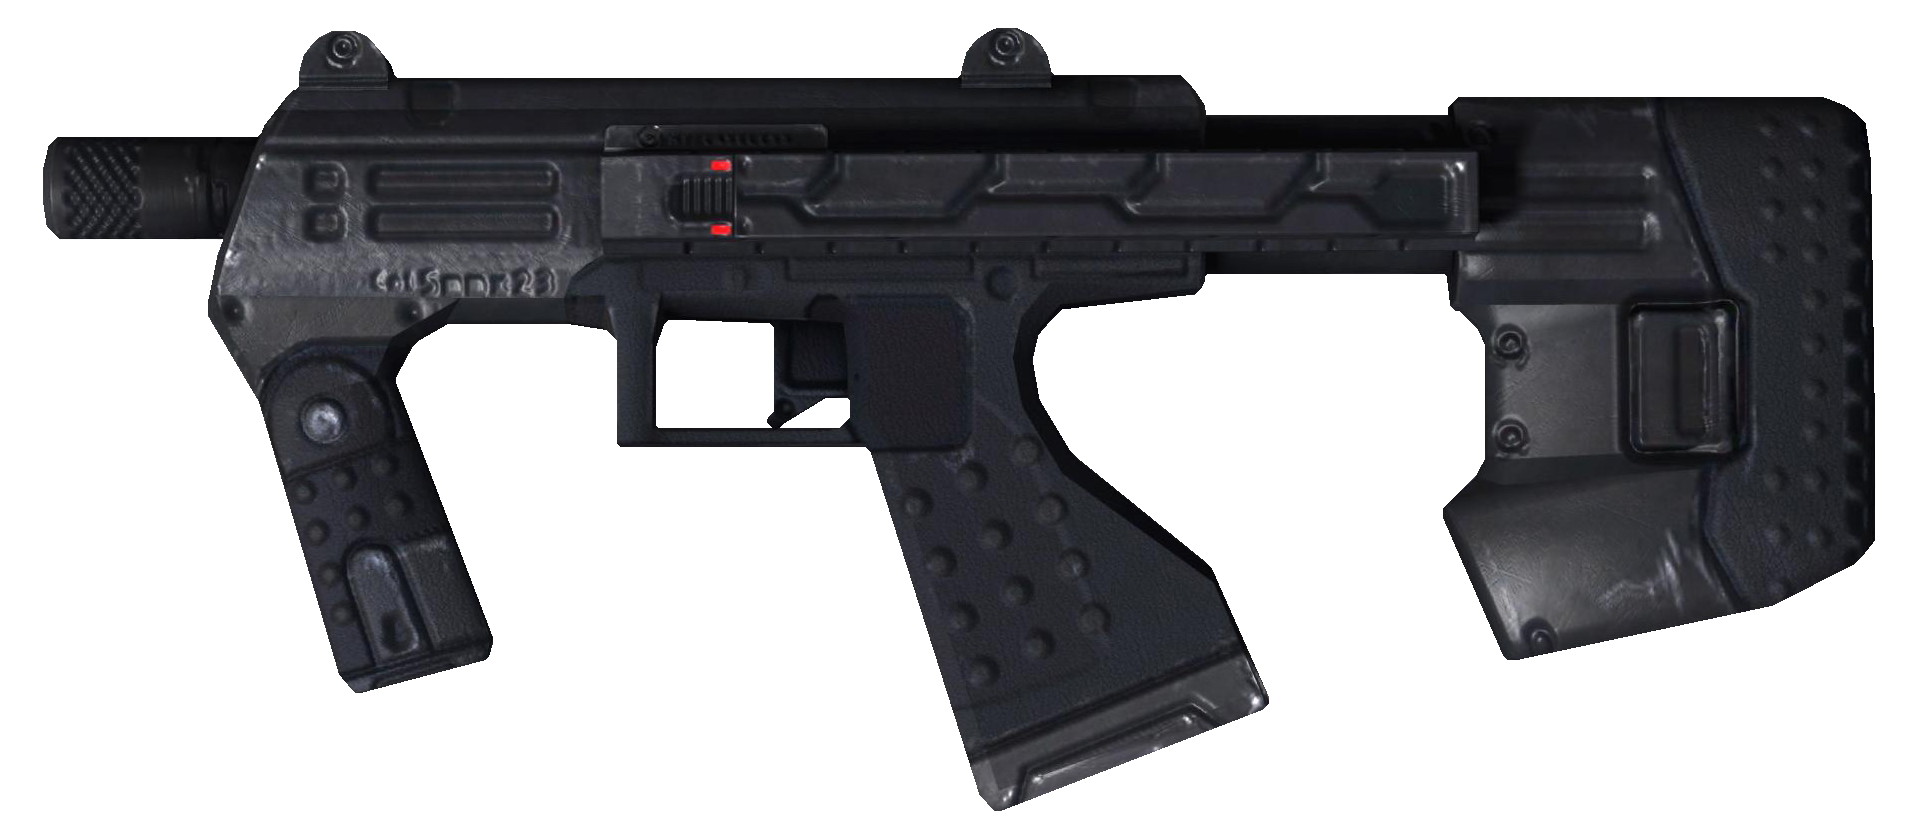
Halo 2 was a bit of a conundrum.  The developers felt that in halo 1 the pistol felt more like a rifle and the rifle acted more like an SMG.  So, they created a pistol that acted like a pistol (a low powered, high rate of fire pistol), an SMG that acted like an SMG (carrying over the reticle and 60 magazine of the assault rifle, but with significantly lower damage) and a rifle that acted like a rifle (the favorite Battle Rifle seen in Halo 2, 3, and 4).  Problem is, they didn’t have a good weapon as a default weapon and they left a hole in their arsenal.  Which is where the Halo 3 rifle comes in, and it is the rifle that all the others try and copy.

Now, Halo 3...


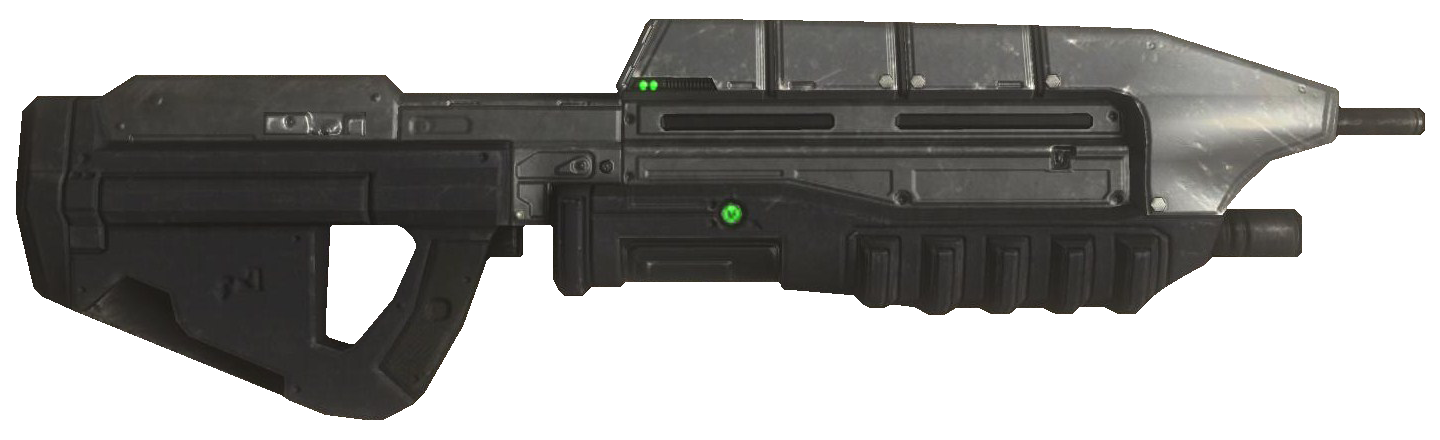
The Halo 3 Assault Rifle, the MA5C, is a complete revamp of the assault rifle.  It fills in the Gap left between the SMG and the Battle Rifle.  This new rifle looks nearly identical to the Halo 1 assault rifle but plays very differently.  They have drastically reduced the number of bullets per magazine, from 60 down to 32.  But they drastically increased accuracy at the medium range.  Again, to fill the gap between the SMG and the Battle Rifle.  The rate of fire is lower, but *supposedly* damage per shot was increased.  Here is why I say *supposedly*.  It still takes exactly 16 rounds to make a kill with the Assault Rifle.  The rate of fire has been decreased compared to the halo 1 rifle (from the original 15 rounds per second to only 10).  But the accuracy increase makes the weapon much more usable and a great jack of all trades gun.

On a more personal note, the gun feels like it isn’t powerful, but then it kills your enemy, and you go “wow, this gun is good”.  It feels like it shouldn’t be as good as it is, so it is a nice surprise when you find this gun is awesome.  In multiplayer, this gun is usually your default, and that is not a bad thing, but it is commonly dropped for other “power” weapons.  But really, it is just as good as any other gun, and works great in combination with melee, grenades, or just other players.  It is also a master of none.  It is okay at long range support, but the carbine or BR are better.  It is great at close range, but the shotgun is better.  Dual spikers are better at medium range (of course, you lose melee and grenades).  It is just a great overall weapon, but many other weapons in different brackets can outperform it.

Next up, Halo Reach:


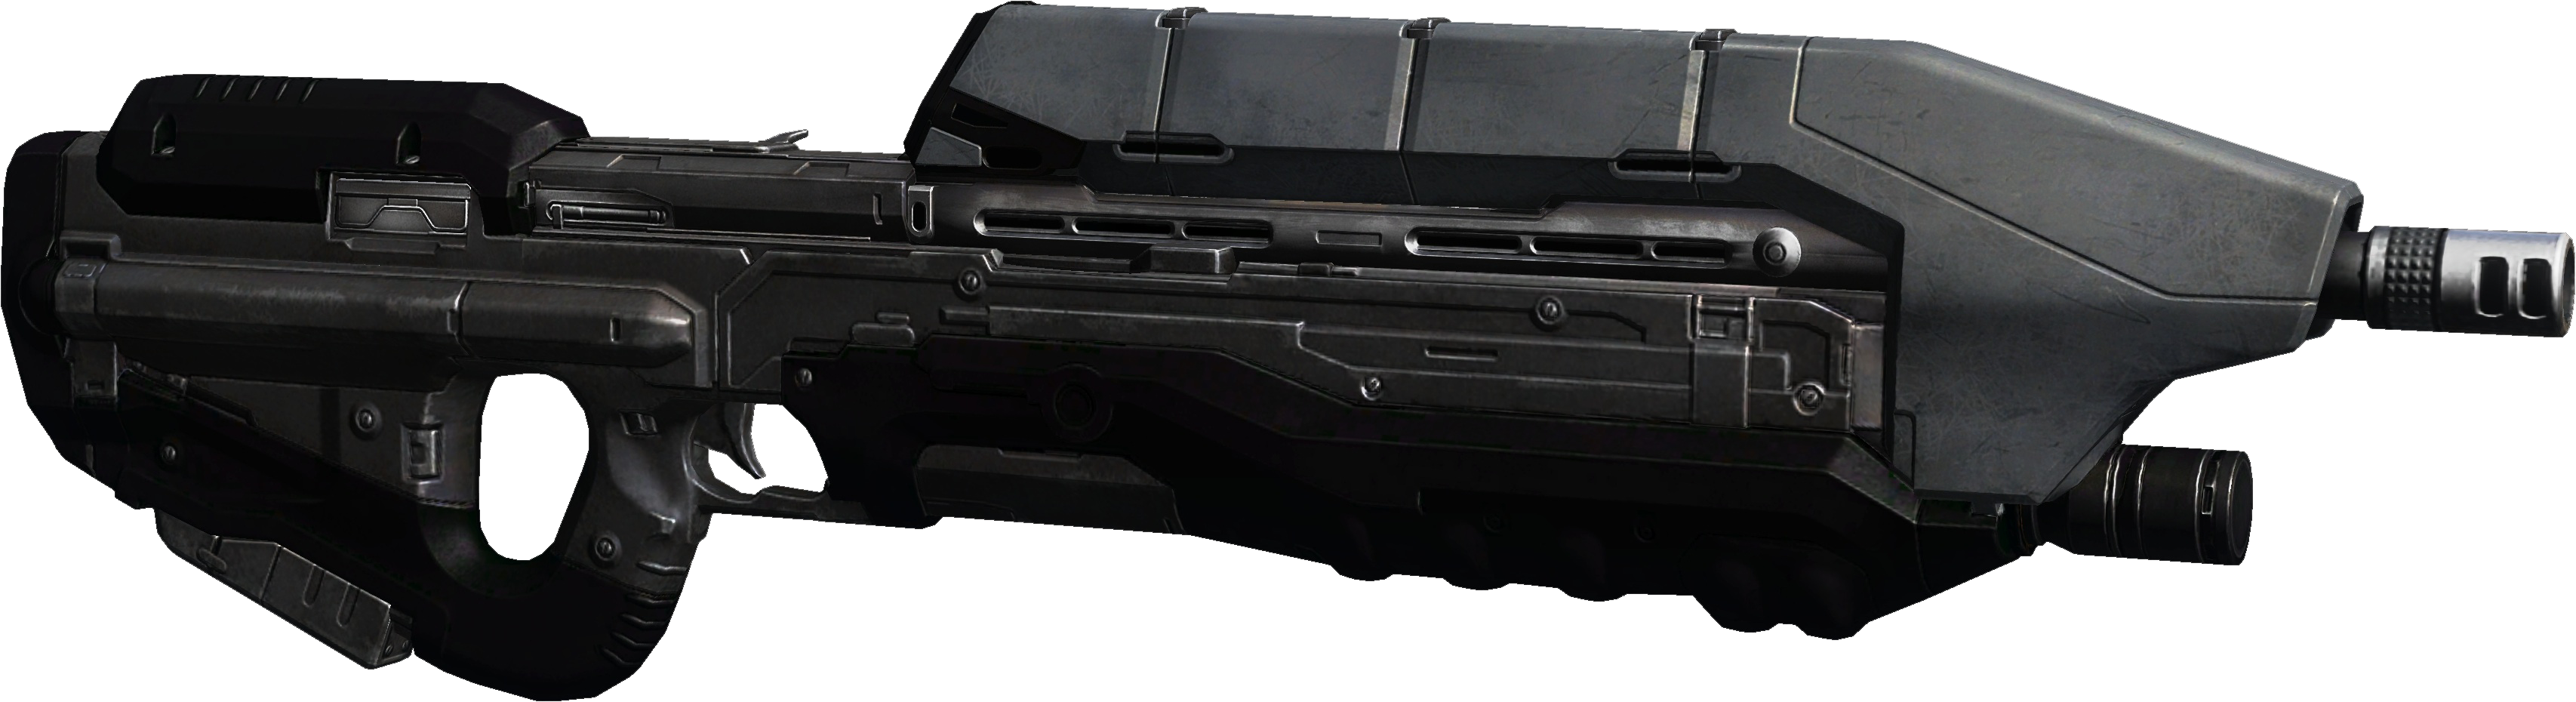
Halo Reach’s Assault Rifle builds off of Halo 3s.  Its looks are new, and is designed to be a more primitive design (though the game is only supposed to happen 4 months before Halo 3, but who is counting…).  The gun still has a 32 round clip, but it feels much more powerful.  They call the gun the MA37, but that is the Army designation.  The navy would call it the MA5 (where the Halo 1 rifle would be the MA5B, the second in the series).  Now, in the game, the rifle works much differently.  It works on a property known as “hitscan”.  This means that if your shot is lined up, and the random variation of the bullet firing crosses the path of your enemy, the bullet instantly travels and hits your enemy.  So, when a bullet fires, it instantly hits.  This is the same for the sniper rifle in all of the games, and the Battle Rifle in Halo 2 onward.  Before this, you would have to lead the assault rifle ever so slightly, because the bullets had travel time.  Also, bullets to kill has been increased, from 16 to 18-19 (varying sources, will try and confirm soon)(edit, just played a round with myself, it is 19 rounds to kill).  The gun feels more powerful than its halo 3 counterpart, but is in actuality less lethal.

Like I said, the gun feels more powerful.  I don’t personally use it much when playing, but I really should use it more.  It is still a great gun, and it feels much better than the Halo 3 rifle.  It feels deadlier, even though it isn’t.  It is very effective still when combined with melee or grenades, though it has been relegated back to its SMG like role, with the removal of the SMG.  In most multiplayer matches, there is no Spiker or Plasma rifle, so the shortest-ranged weapon besides the pistols or the shotgun really becomes the assault rifle.  And this is noticeable.  The removal of the SMG is really a disappointment, as it is sad to see the assault rifle moved back into the short range category.

And finally, Halo 4:


And this short range category is where it stays for Halo 4.  The halo 4 rifle feels a lot like the Halo 3 rifle, but it doesn’t have any lighter weapons to compare it to.  There is no plasma rifle, SMG, Spiker, or Mauler to compare the firepower too, and thus, it feels like one of the weaker weapons of the game, and also, one of the shorter range weapons, compared to its medium-range classification in Halo 3.  That being said, it is still a jack of all trades weapon.  It is a great compliment to one of the games many precision weapons (Battle Rifle, DMR, Light Rifle, or Carbine) and can fend for itself in closer range matches.  Now, I just ran a test in Halo 4, and the gun requires 16 shots to make a kill.  From what I can find on the internet, this has been the same since the release of the game, but a recent balance update states that: “The Assault Rifle damage has been slightly increased. The Assault Rifle now kills in three less rounds.”  Which would imply that it now only requires 13 rounds to make a kill.  This may only be so for matchmaking, but only more testing can prove this right or wrong.

Either  way the damage of the Halo 4 assault rifle is definitely higher than the Reach rifle, possibly even higher than the old Halo 3 rifle.  It doesn’t feel as powerful as the Reach rifle, which makes it slightly less fun. 

Now, for the winner.  We have the Halo 1 rifle, inaccurate death hose, the Halo 3 rifle, the new weapon that is surprisingly powerful, the Reach Rifle, which feels more powerful than it is, but is still fun to use, and the Halo 4 rifle, which gets its power back, but feels very short range.  From my descriptions, you have probably guessed the winner. 

The Halo 3 rifle takes the cake.  Every time I use it, it still surprises me.  It is an elegant weapon from a more civilized age.  It just gets the job done right. 

Now, some of you may disagree with me, but I love that Halo 3 rifle.  All the others have their strengths and weaknesses, but Halo 3 was the first that used the more accurate, lower ammo system that the other 2 were based off of. 

So, what do you think?


As a note, I would like to do more of these in the future, comparing pistols, plasma rifles, grenades, or anything else really in the Halo series.  Comment if you have a preference!